 Cleanzine: your weekly cleaning and hygiene industry newsletter 10th July 2025 Issue no. 1170
Your industry news - first
The original and best - for over 20 years!
We strongly recommend viewing Cleanzine full size in your web browser. Click our masthead above to visit our website version.
Prolong lifespan of commercial kitchen appliances with proper cleaning
 Beckie Hatton, product manager at Home Appliance Care, shares her top tips for cleaning commercial kitchen appliances to improve their lifespan.
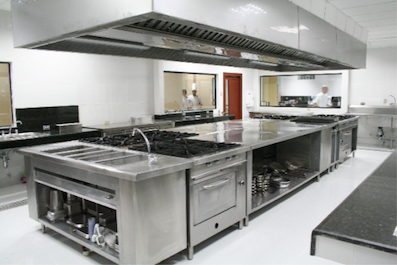
"Whether it's a restaurant, bar, or hotel, ensuring appliances are properly cared for and maintained is vital, both for longevity and health & safety. To ensure that a commercial kitchen is kept at the highest levels of hygiene, it's important that the correct cleaning procedures and followed. Over time, grease and dirt will naturally begin to accumulate on ovens, refrigerators and extraction units. If allowed to build up, they can become a fire and health risk. I'm going to explain how best to clean each of the main commercial appliances.
Essential tools and cleaning supplies:
Half the battle of successfully cleaning kitchen appliances is having the right tools and cleaning supplies for the job. Here's what you'll need:
* Rubber gloves
* Non-toxic kitchen cleaner
* Oven and grill cleaner
* Degreaser
* Stiff wire brush
* Stainless steel scrubber
* Stainless steel scraper
* Kitchen cloth
* Scouring pads?
Ovens and stoves...
Ovens are a key tool in any commercial kitchen, but can become a hotbed for dirt and food by-products. To start, remove all oven racks and leave them to soak in a mix of non-toxic cleaner and warm water for a few minutes, before scrubbing them clean. You can use a stiff wire brush to scrub the inside of the oven and remove any loose crumbs and debris using a brush or cloth. For more stubborn areas, allow your cleaner to sit for a few minutes before scrubbing clean with a stiff wire brush. The exterior of the oven should also be cleaned with a kitchen cloth using a non-toxic cleaner and warm water.
Burners and flattops...
Before dealing with any burners, it's wise to disconnect the gas supply and power to the appliance. Start by cleaning any burnt food and grease from the surface and burners themselves with a scraper, using degreaser for anything that is particularly tough. Soak all removable components in soap and warm water to help soften any grime. Wipe down the surface with a non-toxic cleaner and warm water, but don't use anything acidic. Finally, scrub each burner individually with a wire brush or scouring pad and allow them to dry before reassembly.
Refrigerators and coolers...
Start by removing all shelves and flooring (for walk-in fridges) and spray the interior and exterior using non-toxic cleaner. Allow it to sit for a few minutes before wiping the fridge down, including any corners, nooks, and crannies. Don't forget to also wipe down the door seals, too. Make sure to dry allsurfaces afterwards to prevent bacteria and mould growth. Most fridges will also have a drainage hole at the bottom which should be cleaned, either with spray and a cloth or a wire brush. The condenser coil, usually located at the back of the fridge, should also be cleaned using a stiff bristle brush and vacuum to help remove dust and grime.
Extractor hoods and vents...
When grease is allowed to build up in extractors, airflow can be restricted and ventilation becomes limited. Scrubbing the outside with degreaser and a stiff wire brush is essential, but it's the interior that is the main concern. The unit should be disassembled if possible, allowing the thorough cleaningand degreasing of the filter tracts and collection troughs. Clean the base and blades of any wall mounted fans, and ensure that all ducts within the ventilation system are also thoroughly cleaned.
Deep fryers...
Commercial deep fryers will have their oil changed frequently, but they need to be fully cleaned and boiled out from time to time. Drain the fryer and allow it cool before scrubbing the inside with a metal brush to remove any fatty deposits. A cleaning rod can be used to clear any debris in the drain line, including bits of food and grease. Fill the fryer with a combination of water and cleaner and allow it to boil for 20 minutes or so. Drain the fryer once more and give it a final scrub. Rinse thoroughly and dry.
Cleaning commercial kitchen appliances doesn't have to be a never-ending chore. Follow the advice in this guide and you'll be able to do a speedy and thorough job.?"
5th September 2019


